Inventory items can be combined with PCBs and other inventory items to create System Integrated Products or Final Electronic Assemblies.
Here, we will cover the different ways you can create new inventory items.
Creating Inventory Items
There are three ways to create new inventory items:
- Create Inventory Items manually from the Inventory Management Screen
- Create new Inventory Items when creating a Product
- Create new Inventory Items by creating an Inbound Shipment
In this article, we’ll focus on creating new items manually from the Inventory Management Screen. For the other two methods, see the articles on Creating Products or Shipping in Inventory.
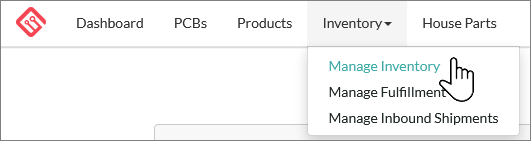
To access the Inventory Management Screen, click on Inventory in the upper left of the platform and then Manage Inventory from the drop down navigation menu.
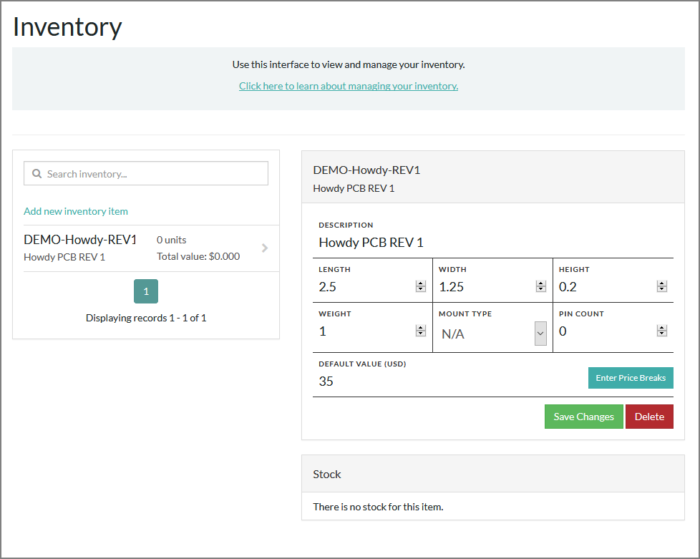
The screen will look similar to the image below.
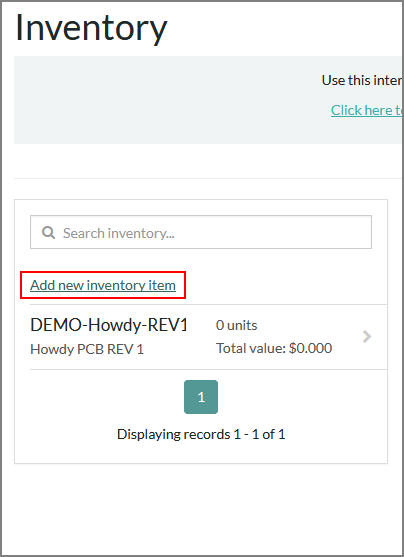
To manually add a new Inventory Item, click the text link Add new inventory item directly below the Search box.
The right panel on the screen will now show a blank Create New Inventory Item form ready for you to fill in.
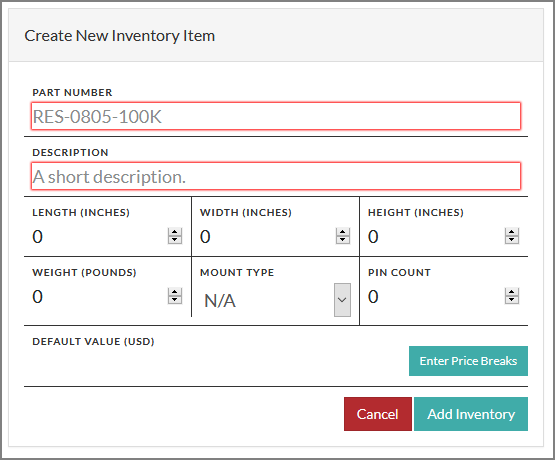
Clicking on any field will let you edit that field. You must fill in the Part Number (aka ‘SKU’) and the description before you can add the item.
Part Numbers / SKUs need to be meaningful. If you’re shipping in a part to be used in building PCBs, it should have the exact manufacturer part number you intend to use in your PCB's Bill of Materials, otherwise the platform will not be able to offer you to build from inventory for that part. If you use the inventory item in other ways, treat the Part Number as a SKU. A SKU is a Stock Keeping Unit, a unique identifier for your item that will be used in numerous places, but especially in inventory. Once you have entered the MPN or part number, please also add the part attributes - Mount type and Pin count. This is critical as the platform will not allow one to use a part without the attributes.
Click on the Add Inventory button to save the new inventory item. The interface will change to show an item that is completed and can be edited. You can edit any inventory item by clicking on the field you want to edit, changing the value, and then clicking on the Save Changes button.
Part Numbers Cannot be Changed. Once you’ve saved an item, you cannot change the part number. Ensure that you’ve set the correct part number before saving the item!
Inventory Questions?
Need help creating inventory items or how to use them in your PCB assembly? Contact our support team to get back on track!