If your product is just an assembled PCB, without an enclosure or any other items, you will need to make the assembled PCB a stand-alone product to be able to drop ship and fulfill your product from MacroFab directly.
If your product is just an assembled PCB, without an enclosure or any other items, you will need to make the assembled PCB a stand-alone product to be able to drop ship and fulfill your product from MacroFab directly. For example, this is common with maker-oriented products and Kickstarter campaigns for development boards. In this guide, we will go through everything necessary to create a product out of your PCB design, and then show you how to build the PCB into your inventory directly so that you can start handling fulfillment requests.
Step 1: Define Your PCB Project and Order Prototypes
Before you can create a product around a PCB, you must have a PCB that you’re ready to ship out to customers. Create your PCB project like normal, and order at least one prototype. You won’t be able to make changes to the PCB on the manufacturing line, and you want to ensure that your PCB is being manufactured correctly and that it works as expected before building a large number of them into inventory.

Step 2: Create a Product
Once your PCB assembly is ready, make a new product. See the knowledge base article, Creating a New Product for more details.
Step 3: Link your PCB to the Product
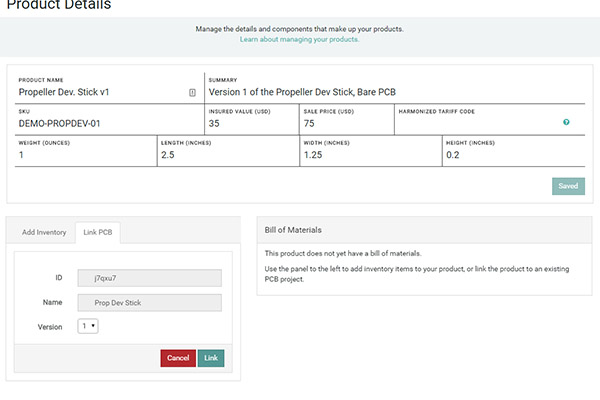
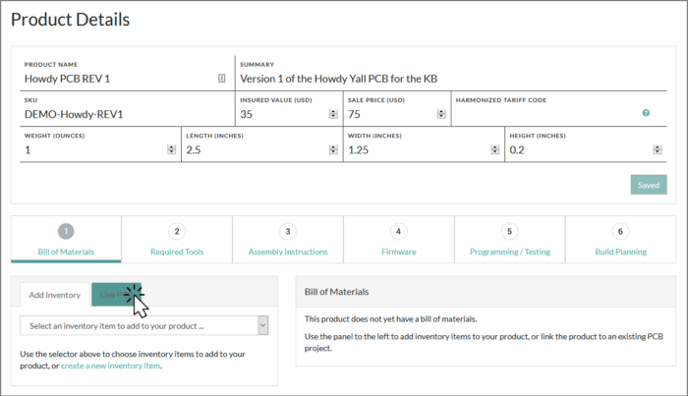
This is the step where everything starts to come together. At the bottom left of the product page, click the Link PCB tab, which is next to the Add Inventory tab. Once you click this, a list of available PCBs will be displayed.
After you click on the PCB you want to link to the Product, you will be asked to select the PCB Version you want linked to the product. Only a single PCB version may be linked to a single product at one time. You will have to delete the product if you wish to create a new product linked to the selected PCB Version. If you have multiple versions of a PCB, you can turn each version into a stand-alone product, which is a great way to sell different versions of your PCB with different components or configurations.
Why only one product per version? If you had multiple Products linked to a single PCB Version, we wouldn’t be able to figure out what SKU to assign to the PCB after it had been built, or how to put it into inventory for you. A single Product per Version ensures that there is no confusion as to where your product goes when we build into inventory.

Once you’ve selected the correct version, and then pressed the green Link button, the Bill of Materials for the product will automatically update from the PCB project, showing you what components make up the product. You’re now ready to start building into inventory!
Step 4: Build into Inventory
Now that you’ve created the Product and linked it to the correct PCB Version, you can start building into inventory. To do this, you will go back to the PCB that is associated with the Product, and ensuring that you’ve selected the correct version, set the desired amount and click Order Now. More information on how the ordering process functions can be found in the knowledge base article, Ordering Your PCB Assembly.
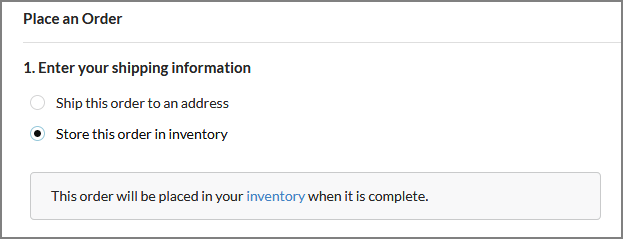
On the check out screen, under section "1. Enter your shipping information", you will see the option to "Store this order in inventory". Select that option, pay for the order, and you’re all set.
Once your order is complete, instead of the standard “Your order has been shipped!” email, you will receive an email stating that your order has been stored to inventory.
Shipping Note
Unless you instruct us to otherwise, we always individually package PCBs in an anti-static bag, heat-sealed with desiccant. This minimizes the risk of humidity or ESD damage during storage, and for many projects this works well enough for shipping when combined with a bubble mailer.
Need Some Help?
Have more questions about shipping PCBs and products directly into your inventory? Contact our support team!


